Wednesday, November 21, 2012

Large Class Science Journal / Student Learning Journals

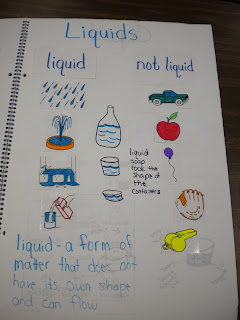
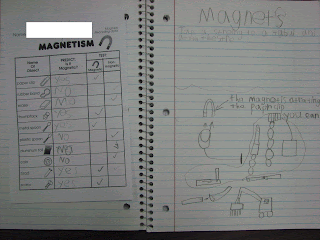
When my students are not successful at something I have to look at what I did to teach and where I fell short. For years I gave my students spirals and just expected them to be able to take notes or journal effectively. I was always amazed how they just wasted paper and drew pictures all over the journal. So the large class science journal was born. (it is just a spiral tablet - with no lines - turned on it's side)


I use a science journal because so much of science is experiments and the journal helps remind me to bring the experiment into learning. As the class discusses why we did the experiment and what we learned, I journal. Over time I have also began to add worksheets or experiment note pages into the journal as well.


I realized that I needed to model note taking and journaling over and over before I ever expected my students to do it themselves. And since I use the gradual release of responsibility in the content I teach, I applied it to this as well. I continue to journal science experiments and learning throughout the year. But after weeks of modeling I then allow the students to get their own learning journals. The first few entries are guided and still modeled in the large science journal. After I feel like they have an understanding of the journal, I allow more freedom.


Sometimes I want a learning journal that is not just for science. I have a separate journal for any other topic I want to journal.


The spirals the students have are labeled as Learning Journals because I want them to be able to track any subject in there. They work well for foldables (my district seems to be in love with these), notes, and worksheets. Usually if you shrink a worksheet in half then you can get two per copy (you know principals love less copies) and they fit perfectly inside of the learning journal.

Tuesday, November 20, 2012

Energy Hunt

This lesson was so much fun – I just had to share! I wasn’t sure how it would turn out but after I saw my students getting so into it I knew it was a keeper. We have been in our energy unit. We had spent a couple of weeks studying heat, sound, and light energy. This was a fun way to bring the unit together. Since our standard says to find examples in everyday life, I figured that an energy hunt around the school would be fun.


My science consultant and I worked on this little Energy View Finder together. I cut out the center rectangle and laminated the. This was a good idea because the kids are not what I call gentle with things… We went around the school and I would stop the class in various locations. They then used the Energy View Finder to focus on different forms of energy. They were so engaged and found examples I never would have thought of myself. 


I just love when an idea comes together and the students love it. I actually had students ask me to make more of these so we can do them for other topics. We had just finished a unit on geometry and one of my students said it would be good to go on a shape hunt with a Shape View Finder. When he suggested that my class started clapping. I love how excited first graders get about learning!


Monday, September 3, 2012

Meet the Teacher

Monday two weeks ago was officially my first day back to work.  That means my day was full of meetings and in-service.  Luckily I’ve been in my room the two weeks before getting all my crazy organization issues under control and getting a little craft on (as seen with my crate storage and crate seating posts).
My team this year has 2 first year teachers and a teacher who has moved down from another grade level.  I’m SUPER excited about the new team!  Our school had in-service this entire week.  The kids started back today; however, we have Meet the Teacher / Parent Information Night on Tuesday of in-service week.  That means the room has to be ready by Tuesday evening and so do all of our handouts.
So I’m sharing what I do for Meet the Teacher / Parent Information Night and hopefully you’ll get some good ideas and share yours with me.
Meet the Teacher is from 6:00-6:30 and the kids come in with their parents and wander around the room.  I take a picture of each student there for his / her locker tag and lunch choice card.  This also helps me get most of the names memorized by the first day of school.
I have a checklist on each student desk so parents know what to do while I am taking pictures and meeting other parents.  This keeps me from having to repeat the same thing 24 times or be dominated by one family.
 
One of the first thing my parents do is sign in.  This helps me remember who was there that night.  If you notice my sign in also has how the student is getting home the first day.  It happens every year – little Johnny will ride the bus, but on the first day of school mom really wants to pick him up.  That section is a life saver with figuring out who is getting home how on that first day if it deviates from the routine.
 
 
My school uses Continuous Improvement and so we have certain requirements.  One of those is that the 3 questions be asked of parents on Meet the Teacher.  I have found sticky notes and posters are the easiest way to get the information.  I then create a document listing all of the answers and my responses to those.  I included last year’s document in case you wanted to try something like that.  It is time consuming but parents seem to appreciate that you listened to them and responded.

 
One of the items on my checklist is to pick up a heart from the helping hearts pocket chart.  I am always surprised how many people will grab one and send the supplies that first week of school.  I usually request things that are not on our school supply lists – sharpies, address labels, etc. 


At 6:30 the students are taken to the gym to watch a movie and the parents sit down for Parent Information Night.  We used to do this a couple of weeks after school started (which I prefer), but have combined the two nights into one crazy-full one.  During Parent Information Night I use a PowerPoint to guide me through all the topics I want to cover – discipline, student binders, homework, grade level shirts, grading, data folders, etc.  I get off track if I don’t have something to guide me and so I’ve found a PowerPoint is perfect to help me focus.
 
This is a little handout I give the parents that night.  I have found that making it different – a little flip book instead of just stapled sheets of paper – seems to give a nice touch.  I started using colorful paper as well.  Little details like that let parents know you put in the extra effort.  You could use any headings you want with the same basic idea.  I like adding a class list in there – that is helpful for birthday invitations and valentine’s cards. 


It took me a while to get the spacing just right and the page layouts to look nice for these pamphlets.  Hopefully you can download and edit from my GoogleDocs links above and save yourself some time.  You will just need to copy the Cover and Discipline front to back, Contact Information and Reading Program front to back, and Class List and Schedule front to back.  It takes a bit of preparation to do this, but the impact on parents is worth it.
I also give each parent a magnetic business card.  Again, little details like a business card with your contact information and conference times helps set up that you are a professional.  I would highly recommend that you also invest in magnetic business cards.  You peel the paper off and can stick your business cards directly onto them. 

We used to send home t-shirt notes the first week of school.  But I have found that some parents will actually fill out the form and return it with money that night or the first week of school instead of waiting until the last minute.  I’m really excited about our shirts this year.  If you think they are super-cute (like I do) and want to look into them you should visit CustomInk.com.  They have awesome designs and are always super-sweet when you talk to them about orders, etc.
 
Another note I have out that night is the photo / video release.  I’ve found that if I show them my class website with all the cute pictures and videos they are more likely to sign that waiver.  Also, this note never has to go home – it can be signed and left on the desk and that is one less thing for me to worry about once school begins.
 
And to finish off the evening I send the parents and students home with some cookies and a poem.  The cookies make the kids smile and the poem gives parents warm fuzzies.  I am a very professional / organized personality.  Sometimes the moms just want to know that I care.  The poem reassures them that we will work together to help those precious little first graders.
 
Hopefully you got a few ideas to add to your Meet the Teacher bag of tricks.  Let me know if you have any other great ideas – I’m always looking to improve.  Arrggg…I must have drank the Continuous Improvement Kool-Aid!

Saturday, August 25, 2012

Filing Crate Seating


I haven’t been blogging because I’ve been in my class the last couple of weeks.  It’s been fun actually setting things up and making all the fun things I have pinned from Pinterest.  So here is another crate project I did.

I’m sure you have all seen the cute little crate seats on Pinterest.  This is my tutorial of how I made them – full of pictures of course.


First, I found the perfect little dog fabric.  It happened to be blue so I went back to Wal-Mart and picked up some more crates.

I then went to Lowes and had them cut some plywood for me.  I brought a crate up there because another blogger said it was a good idea.  She was right – a couple of pieces didn’t quite fit with the first cut.  It was funny because as I was checking out at Lowes a worker came up to me and said, “You must be making those crate seats.  All these teachers keep coming in here to make those things!”  

Once my boards were cut I covered the top with foam – the roll out kind that I got at the sewing section of Wal-Mart.  One roll covered all 6 crate chairs I made.  The last one had to be pieced together, but you can’t tell once it’s all done.


Then I cut the fabric to size and used my super heavy duty staple gun to secure it all down.


I really like the way these seats turned out.  They also help make the room feel larger because I don’t have chair legs sticking out from the two tables I used them at.  I think it’s more of a visual thing than actually having more space, but whatever.  It’s a fun project that adds a little personality to the room. 
 
And they come in handy for storing all those supplies I get at the beginning of the year that we consume: spirals, tissue boxes, pocket folders, manilla paper.  We have so much of it early on that I can't always find the room to store it at the beginning of the year...problem solved this year!


Saturday, August 18, 2012

Table Storage using Filing Crates


Over the summer I tried to think of ways to make my classroom less crowded.  I had tables with a desk at the end to hold my buckets and crates for the student notebooks.  I wanted to get rid of the desks at the end of each table in order to make more room. 

My mom came up with the idea of using zip ties to put 2 crates together under the tables for storage.  I love the idea because the crates are under the tables, separate the students a little, and are pretty sturdy.  I’m a very visual person so here are some pictures of how you can turn simple filing crates into storage / organization for your classroom.

I bought these crates for about $3.50 at Wal-Mart.  My mom already had zip ties, but I’m sure Wal-Mart has those too.


I put a zip tie in each corner of the crates and then snipped off the excess.


Next I use felt feet on the bottom of my crates. You could skip this step if you have carpet.  I don’t want the kids pulling the crates out from the tables, but I’m sure they will move around sometime so the felt feet will keep our newly waxed floor nice and shiny.


One side of the crate will be used for notebook storage and the other side for the pencil boxes.  I like this idea because sometimes when the students were at their desks they would play with their pencil boxes.  Now they will be safely stored in the crate (by my table captains) until they are needed.


I love this idea because my room already feels larger just by removing 5 desks.  I must admit my mom (once again) has made my classroom an even better place to be!

Tuesday, July 10, 2012

Daily 5 and Social Studies Integration

I don't know about you, but I have too much to teach and not enough time! I have found that the only way to get it all in is to integrate as much as possible. Social Studies is the most logical subject to integrate into the reading curriculum (although Science works out well sometimes).

 This is what I always hear but no one ever explains how to effectively integrate the two. It's more than just reading a Social Studies text as your Daily 5 mini-lesson. You have to use strategies in that text. This lesson is one that I have found the students love because it includes singing. I'm able to pull accuracy, comprehension, and fluency mini-lessons out of one text. After the mini-lesson I have clips of the students working together in their poetry folders. I also included what I use after that when I meet with small groups that need to focus on some of our phonics sounds to review. You can use the same text for whole group, independent / partner work, and small group teaching. It doesn't have to be something new all the time. If you pick your text well you can milk it for all it's worth - okay I'm stepping off my soap box.


Like I mentioned, Social Studies seems to lend itself well to being integrated into Daily 5.  The video above shows a mini-lesson and some student practice.  I also have some photos below of other ways to tie a United States unit into Daily 5.


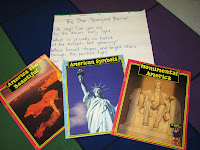
Here are some big books I use during Social Studies and also Daily 5 mini-lessons.  These books are from Big Books by George.  I love them because you can get a big book, small book, and CD.  So we might read a page from American Symbols about the Statue of Liberty during a Daily 5 mini-lesson.  Then I would ask the students what else they know about the Statue of Liberty and we would discuss how their Schema helped them understand this book better.  I hope that makes sense to take the Social Studies concept but pull it into a reading mini-lesson.


These pictures are of my Listen to Reading options after we have been in the United States unit for a while.  The students have already heard several of these books during the Social Studies lessons but now are getting another chance to listen to them during Daily 5.


This is the poster I use to teach when I have students point out phonics rules we have learned.  I can then use this same poster with a small group.  I have chosen certain rules that I think my small group might need to work on and covered those words.  We can then discuss them and use the phonics in authentic text.


Here is my Pledge to the American Flag Word Work part of Daily 5.  We know the Pledge because we recite it each morning.  However, it is not until later in the year (the US unit is around January / February for us) that I put this into Word Work.  This seems to be a better time for the students to actually be able to work with the words because they have a better grasp of reading at this point in the year.  I got the words and pictures from LRE.com. 


They have a lot of good resources, but if you look at this one you will notice I do not use the resource in a lesson like they have on the website. I take things and work them into the framework I already have set up in my classroom.

Tuesday, July 3, 2012

Before and After a Round of Daily 5

Sometimes it seems easier to just assign students to a Daily 5 rotation or just let them go one table at a time. I have tried many things and my teaching has changed as I have seen success with certain practices. I have a chart that someone else made and I adapted to fit my needs. It has my students and the rotations in a graph. I keep track of which choices they have gone to so they get to all the rotations before beginning again. It takes a couple of minutes to dismiss, but I feel the time is well worth it. Please also notice that if the students choose Read to Self I ask them which strategy they want to focus on. I have found this provides more accountability and they have more to share at the end if they already have a plan of action.


I'm sure you have some students who get cleaned up and back to carpet quickly and then it seems like forever before the last few students get there. I try to fill those down times with sight word practice or even begin having the students share what they have learned. Once the students see we are moving on they tend to get back to us more quickly. One of the most beneficial parts of Daily 5 is the sharing after a rotation. I can really see who is using the skills at an independent level and the other students get mini-lesson reviews from other students. If you are not taking a few minutes after each round to share - I think you are missing one of the best parts of the framework.


By the way - please excuse the crazy socks, spray painted hair, sunglasses, etc. in these videos.  These were made during Red Ribbon Week.

Monday, July 2, 2012

Rules Photostory Lesson


I was recently having a discussion with a future teacher about what you do during the first few weeks of school. It reminded me of one of my favorite beginning of the year lessons. After we have started getting to know our rules and routines - the class helps create a project. We give it as a 'gift' to our principals to show them we know the rules and will follow them. The students seem very enthusiastic to have a real audience in the principals and a reason for making the Rules Photostory.


If you have never used Photostory - do not be scared. It is very simple if you are used to playing around on the computer. It is a free download so that is nice! You will also need a digital camera (or scanner, but it's easier to just take pics and download into the computer) and a microphone for this project.


So here is the lesson - I assign each table group an area of our day: blue table gets lunch, green table gets classroom, etc. Then I remind the students of the rules for those various areas and assign one rule to each student. This is a great time to pick students who you have noticed are not following a particular rule and have them illustrate that rule. Also, if you have a student who doesn't seem to be interested in much (usually a boy - for me anyway) the bathroom rule of flush the toilet is a favorite among these kids...


I begin the project by talking about wanting to let the principal's know that we are aware of the rules and really want to follow them. So we discuss how to make a project that we can make as a class and send to them as a 'gift.' The students are pretty much engaged from this point on!


Hallway –

No talking in the halls

Face forward

Keeps hands at your side

Walk in the light blue


Recess –

Be nice to others

Stay away from the fence and street

No climbing trees or fences

Line up when you hear the whistle

Share the equipment


Classroom –

Walk inside

Listen when someone is talking

Keep hands, feet, and objects to yourself

Show respect

Do your best


Bathroom –

No talking in the bathrooms

Flush the toilet

Wash your hands

Throw your trash away


Lunch –

Stay in your seat

Raise your hand if you need something

Push in your chair

Throw away your trash


After each student has illustrated his/her rule you will take a picture of the illustration and load into Photostory. This probably goes without saying...but just in case...you do this slightly time consuming part when the students are not in the room. Once everything is loaded into Photostory you do the next part with the kids in the room.


It takes a while, but the students are genuinely engaged so I usually make it through the whole thing without stopping. If you notice your students getting squirmy then it is easy to save and go back to at a later point. Have each student come up one at a time - remind him / her of their rule and then have him / her record it with the microphone. Then play it back so the student see and hear the progress - they LOVE hearing their own voices and seeing their illustrations on the screen as you do this.


Here is what the final product can be like:


The beginning of the year can be tedious because you have to go over the rules and routines so much - but if you find creative ways to cover the same things: class books, Photostory, etc. then it can be fun. 

Friday, June 22, 2012

Writer's Workshop

Writer's Workshop is one of my students' favorite times of day.  I do have a separate Writer's Workshop time outside of Daily 5.  During Daily 5 my students may choose work on writing, but I like to know there is a time each day (4 out of 5 days in the week) that I have a specific writing mini-lesson and then give the students a chance to try using it if they want.  During Daily 5 rotations I am meeting with students about reading.  My Writer's Workshop time is when I get to meet with students and talk about their writing.

This is a quick video of students sharing after they have had a chance to write.  If you notice my format - sharing writing is something every child does every day.  This would be impossible if I let them share one at a time.  I hope this video gives you an idea of how to allow your students to share with partners or small groups so that each child shares his / her work.  It does not get too loud because the students genuinely care about what they were writing and what their friends are writing.  The students also tend to write more because they know someone else will be seeing their work at the end of Writer's Workshop. 

If they aren't finished with a piece of writing I have them talk through with their partner what they plan on doing to finish it.  This is a great way to have them start planning for the next Writer's Workshop.


Writer's Workshop has a very predictable and purposeful set-up: 

Every day there is a short mini-lesson. I either focus on a mentor author or write myself in front of the students.

Then I have the students think silently (with their eyes closed for about 1 minute) about what they want to write about. Then they turn and talk to a buddy about what they want to write about. This eliminates any comments of "I don't know what I want to write about." The students know writing is just like talking so if they can talk about it, they can write about it.

We then go to our desks and write about the topic they choose. I do not tell them what to write. I might suggest that they use a strategy - like changing text for emphasis, but I let them choose what they want to write.


Then we have share time. I believe each child should share each day - this is important for accountability and so they can think of what they need to do next. The students find partners around the room and share their writing and what they are going to do next if they are not finished with a text. If time permits I have a few students share in the author's chair and point out what strategies they are using well. Author's chair is just for a few students each day so it does NOT count as sharing time. All students need to talk about their writing each day. Sorry - I've found myself on another soap box! :O)

Monday, June 18, 2012

Another Inferring Lesson

I've mentioned several times on this blog that I teach many mini-lessons over the same strategy. This seems to keep the students more interested and focused (most of the time) and gives them more chances to practice. I have already posted one inferring mini-lesson that I use to introduce. Here is another video of a lesson later in the unit. If you see my other inferring post you will notice I had a t-chart lesson with The Art Lesson by Tomie de Paola. This is another t-chart lesson but with a different text.


So Daily 5 is the framework of my literacy block. This is the content - the comprehension skill of inferring - that I teach in a mini-lesson. I teach at least one comprehension skill and one accuracy skill each day. If you haven't used Daily 5 yet then I hope this makes more sense of what your mini-lesson might look like later in the year when you aren't spending all your time going over I-charts and practicing behaviors between every rotation.


During this lesson we were using a t-chart to show the difference between what is in the text and what must be inferred. We had been studying inferring for a couple of weeks when this lesson was introduced. This is just another example of a short lesson that put together with many other short lessons help the students grasp and internalize a reading strategy.

Saturday, June 9, 2012

Classroom Discipline

One of the most important parts of any classroom is discipline.  I have been sitting in on a lot (over 14) interviews lately and realized this is one area that not everyone has thought much about.  Thinking back to my first year...I realize why I failed in that area.  But I made up for it that second year!  Here are a few ideas you might consider and resources you might use with some slight tweaking to fit your style. 

This is the classroom discipline note contract I have in each student's binder.  I have changed it to where there is a section for the parent and student to sign at the bottom to show me they discussed it at home as well.  I just don't have that copy on this computer.


As you can see from my explanation - I see classroom discipline as two parts: rewarding good choices / behaviors, giving consequences to help deter bad choices / behaviors.  Many people just look at it as how you punish bad behaviors. 

In my class I try to reward individually and as a whole class.  So I have coin system and marble jar set up in the room.

The coin system is two-fold.  It helps give an immediate reward - the coin and a delayed reward - the prize.  I explain to the students that teaching is my job and learning is their job.  I get paid to come to school so I will pay them when they come to school.  Each student receives a morning coin: payment for coming to 'work.'  They also earn coins for good behavior.  If one table is working really quietly while the others are goofing off - each student at that whole table can earn a coin.  If I notice the students are taking a long time to clean up and transition - I pay the first few students at the carpet a coin.  These little incentives tend to point out the behaviors I want and induce the other students to follow suit.  Because I want there to be intrinsic motivation as well I do not always hand out coins for every good behavior.  I try to give extrinsic and intrinsic motivators.  But let's be honest - kids like to get things! 


The really good part of the coins (I switched from tokens because of this) is that on bank days the students get to exchange their coins for other coins.  They LOVE bank days even though all they are doing is exchanging what they already have in their wallets.  By the way - I got the wallets at Oriental Trading and they have lasted me 5 years.  If you invest in a BUNCH of pennies and nickels you will be fine.  I have a lot of dime and quarters as well, but not having too much keeps me accountable for having bank days and shopping days on a regular basis.

This is a chart we make early on in the year when we do our first bank day.  We then add on as the students earn more coins and learn different ways to exchange coins.  I also like bank days because they give me a rough estimate of how much money the students have.  I change up how much it costs for various items based on how much money they have.  If I know one student has been working really hard but only has 7 cents, I am going to try and makes sure he/she can get something to help motivate him/her.


On shopping days (they take about 45 minutes) I have one table at a time come up and purchase items.  I have a poster of that too - it helps me from having to re-write it each time.  The only thing I do is put different note cards up with different prices.  But these are my categories: stickers, pencils, book marks, rainbow carpet (a bunch of random stuff - large Weekly Reader issues, Highlights magazines, posters, etc.), prize drawer (again, a bunch of random stuff but the kids like these prizes more - silly bands, erasers, McDonald's Happy Meal toys, etc.), show and tell (they can do show and tell any time they have 25 cents - this is the only prize like that), and stuffed animals.

Although there are tears sometimes on shopping days, they usually are a happy time.  I always try to talk to the student(s) who is sad on shopping day because he/she doesn't have enough to buy a stuffed animal (or whatever) about what he/she can do next time to earn more money.  That talk usually comes after the shopping day when the emotions aren't so high and we can talk more calmly about it.  This proves fairly effective and gives me insight into what that particular student wants to work towards earning.

One last thing about my coin system - just like students can earn coins, they can lose them too.  When we discuss them getting paid to come to 'work' at school we also discuss what happens when people get pulled over for driving too fast.  We talk about fines for breaking laws and tie that to fines in class for breaking rules.  For example, if the students should be working and someone is off task that student may have to pay me a coin.  If a student is not following our morning routine and being disruptive, that student pays a fine.  And my favorite...if a student tattles one someone that student has to pay the person he/she tattled on a coin.  It only takes one or two times of having to pay another student a coin when you tattle on him/her before you learn!

The marble jar is a whole class reward system.  I talk about how teams have to work together and if a team is playing a sport and one person is not doing what he/she is supposed to do then it can cause the whole team to lose.  Also, if a team works really well together then that whole team can win.  So while we are around the school if someone compliments the class as a whole for standing in line quietly, being polite during an assembly, etc. then the whole class gets to put a marble in the jar.  Because each student puts one marble in for each compliment it looks like it fills up quickly.  But I have found they fill the jar up 4-6 times a year which is very manageable. 

I keep the marble jar close to the door so they see it as we are leaving - just a little reminder that how we represent our class around the school can help us fill that jar.


Because they worked as a team to fill up the jar, we choose as a team what the reward will be.  After they have filled it up we sit down and brainstorm possible rewards.  With about 5-8 choices on the board we then vote on which one they would like.  They know that I have to get approval for the reward first, then send a note home, and then they can get the reward.  But I think that is a valuable lesson - we follow chains of command in life.  Some of the choices they have decided on have been: PJ day, bonus recess, board game day (really just the end of the day), lunch in the classroom, water day, etc. 

This is a sample note I send home when we do get the approval for a reward.  I like the parents to know why they have earned this reward since it ties back to my overall discipline.


I know a lot of people like to have their students write the class rules at the beginning of the year.  I may get a lot of people upset with me...but I'm not a fan of that.  I have the rules set because I am in charge.  However, we do spend a lot of time discussing why those rules and there - we act them out, talk about what would happen without them, take pictures of students following the rules, write a class book about the rules.  So the students have a lot of discussion and ownership...but I set the rules.

FYI - there are five of them: walk inside, listen when someone is talking, keep hands, feet, and objects to yourself, show respect, do your best.  I like the last two because they have a wide range of applications.  I love when a student misses a few words on a spelling test and I hear someone comfort him/her by saying, "Remember the rules - you don't have to be perfect, just do your best."  So precious!

One final note about discipline - writing a class mission statement (we use a lot of Continuous Improvement) has helped.  If a student is acting inappropriately I remind him/her of why we come to school and we discuss if that particular behavior is helping us achieve our goal.